Mastering Custom Columns in Power Query
Parth Lad
4 min read

Hi there, welcome to my blog on Mastering Custom Columns in Power Query. In this post, I will show you how to unleash the power of data transformation by creating custom columns that can perform complex calculations, manipulate text, or extract information from other columns. Custom columns are one of the most useful features of Power Query, as they allow you to customize your data according to your needs and preferences.
Custom columns are essentially calculated columns that you can add to your data table during the data transformation process in Power Query. They allow you to create new columns based on existing ones, perform calculations, apply logical conditions, extract specific information, and much more. With custom columns, you have the freedom to shape your data exactly the way you want it, enabling deeper insights and better decision-making.
Let me give you some examples of how to create & use custom columns in Power Query.
Let’s say you have a table with customer sales data and you want to create customer segments based on their sales range. You can create a custom column with this formula:
Tier =
if [Sales] > 2500 then "High" else
if [Sales] > 1500 then "Medium"
else "Low"
This will create a new column that shows the customer segment of each customer based on the sales amount.
To create a custom column, you need to follow these steps:
- Open the Power Query Editor and select the table to which you want to add a custom column to.

2. On the Add Column tab, click on Custom Column. A dialog box will appear where you can enter the name and formula for your custom column.

3. In the formula box, you can use any of the Power Query functions or operators to define your custom column. You can also refer to other columns in your table by using their names in square brackets, such as [Sales].

4. Click OK to create your custom column. You can see the result in the preview pane and adjust the formula if needed. Also, don’t forget to change the data type. In this case, it would be text.
A simple tip to reducing an unnecessary step, you can simply write “, type text”.

You can also create a column using the Conditional Column option just like we did above.

The following are some other examples you can create using a custom column.
Example 1: Suppose you have a table with sales data and you want to calculate the profit margin for each product. You can create a custom column with this formula:
[Profit Margin] = [Profit] / [Sales]
This will create a new column that shows the percentage of profit over sales for each product.
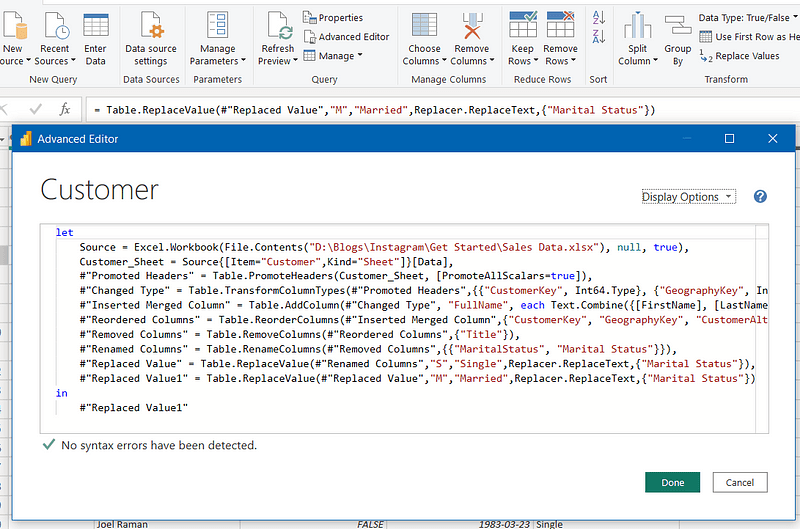
Example 2: Suppose you have a table with customer data and you want to extract the first name and last name from the full name column. You can create two custom columns with these formulas:
[First Name] = Text.BeforeDelimiter([Full Name], " ")
[Last Name] = Text.AfterDelimiter([Full Name], " ")
This will create two new columns that show the first name and last name of each customer.
As you can see, custom columns are very powerful and versatile in Power Query. They can help you transform your data in many ways and make it easier to analyze and visualize. If you’re looking to learn how to create a calculated column using DAX, please check out my blog on Calculated Columns in Power BI. Remember, you can also use Power Query in MS Excel.
If you enjoyed this blog post and learned something useful and would like to receive notifications about my new blogs, please follow and subscribe to my Medium account. Also, please don’t forget to give me a clap and save it on your reading list. Stay tuned for my next blog posts with tons of other Power BI tips and tricks. Feel free to leave your comments and feedback below. Thank you for visiting!
Written by
Parth Lad
I'm a data analyst who loves finding insights from numbers and visualizing them. I write about Data Analytics, Data Engineering, Power BI, and DAX on Medium & Hashnode.
Follow me for more!✌️😉